Whether you’re new to Google Slides, or already have some tricks up your sleeves like adding fancy fonts and adding backgrounds, it’s important to understand presenter view and edit mode. Just like any digital tool, knowing the best way to use each of these will make your teacher life easier.
Present or Edit: That Is the Question
Edit Mode in Google Slides
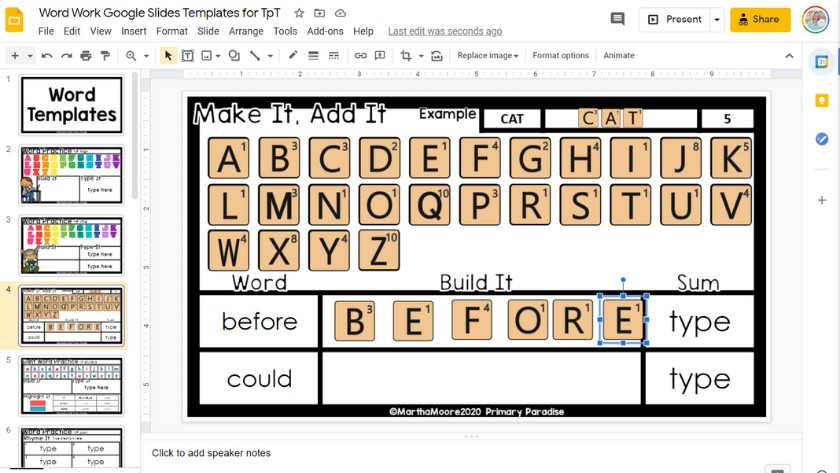
So, what’s the difference between these two options in Google Slides? The answer is pretty simple. “Edit” mode allows you to create and make changes to the slides. This mode isn’t just for you as a teacher though. If you want students to complete any activity, move pieces, or type on a Google Slides presentation, they need to be in Edit mode. (With one exception, but I’ll get to that in a moment.)
Edit mode is the default mode when you create a new slideshow. It’s also the default when you are sharing a presentation with students. Typically, if you want your students to DO anything with the presentation, they will be working in Edit Mode.
Presentation Mode in Google Slides

Presentation mode is exactly what it sounds like. It’s where information is presented full screen. You can play videos and listen to audio through presentation mode, but students can’t complete any activities in present mode. (With one exception, but we’ll talk about that next.)
Presentation mode is great if you want to share information with your students. And, if you are sending them a presentation, you can share it with them so they can’t edit it. Here’s how.
- Copy the share link (in the top, right hand corner of your Google Slideshow.
- Paste it into the address bar.
- Close to the end of the URL, you’ll see the word “edit”. Remove the word edit and replace it with “present”.
- Copy the new URL, and share it with your students.
When students open the URL, it will automatically open in present mode. Be sure not to change any other part of the URL, or it won’t work. Also, I always recommend testing your URL before sending it out to students.
Presentation Mode Exception

I’ve said that you can’t edit activities in presentation mode, but there is one exception. In the Chrome Web Store, there’s a chrome extension (meaning, students will need to be using the Chrome Web Browser), called Fullscreen Interactive Google Slides (TM). This extension allows students to edit Google Slides activities in present mode! The benefits of this extension is that it removes all of the things from the sides, which makes it less distracting for your students. However, if they’re doing just fine working in edit mode, it’s probably not necessary.
Feel free to join my FREE Facebook Club for k-2 teachers here!
Find me on Instagram, Facebook, Twitter, and Pinterest!

