Add hyperlinks to your Google Slides activities to give your students access to other content on the internet. In this article, I’ll explain what a hyperlink is and how to add one to a Google Slide presentation.
What is a hyperlink?
Simply put, a hyperlink is an image or text that links to another place. A hyperlink can link to another slide in your presentation, another presentation, a website, a document, an activity, a Google form, a video, and so on. Hyperlinks are a great way to share more content and make your presentation interactive. Adding hyperlinks to text or images in Google Slides is very simple.
Where can you hyperlink to in Google Slides?
When adding hyperlinks in Google Slides, you have many options. You can link to a slide in the same presentation, a completely different Google Slide presentation in your drive, another document or form, a website, a game, a video (learn how to embed a video here), or basically anywhere on the internet. Hyperlinking makes it easier for students to access the information because they simply click on the text or link and will automatically be taken to the place you linked. This means students don’t have to copy and paste a web address, or scroll to the correct slide.
How do you hyperlink text in Google Slides?
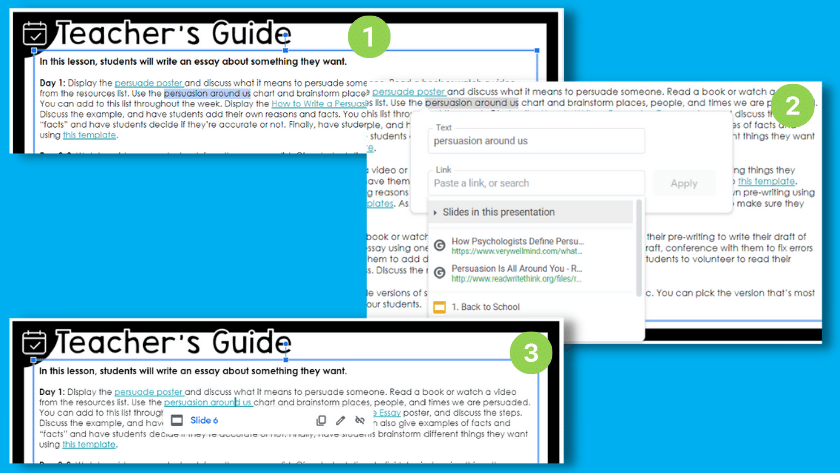
Hyperlinking text is very simple. Here are the 5 steps to adding a hyperlink to text.
- Highlight the text you want to add a link to.
- Right click on the highlighted text.
- Click on “link” (or you can use the shortcut control+k).
- Add your link. If you are linking to a website, add the URL. If you are linking to another slide, click “slides in this presentation and select the slide.
- Click apply.
Boom. Done. It’s really that simple! Be sure to test out your links before sending the presentation to students.
How do you hyperlink an image in Google Slides?
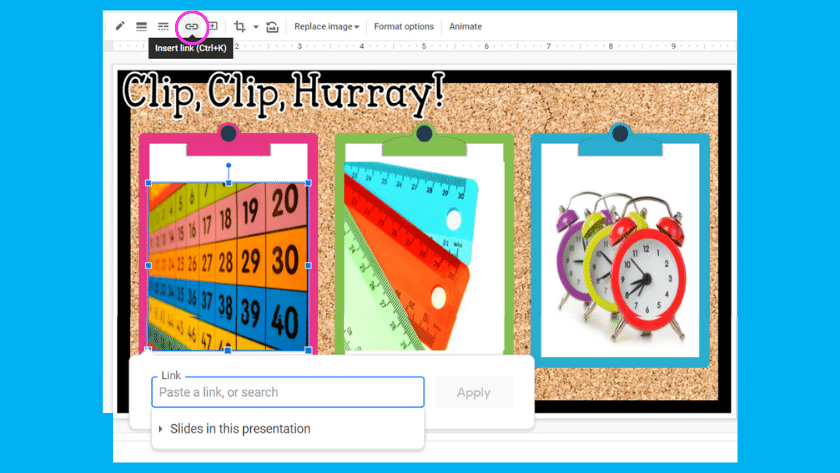
Adding a hyperlink to an image works almost exactly the same way.
- Click on the image you want to add a link to.
- Click on the “link” icom in the toolbar (or you can use the shortcut control+k).
- Add your link. If you are linking to a website, add the URL. If you are linking to another slide, click “slides in this presentation and select the slide.
- Click apply.
Now, when students click on the image, it will take them to the place you designated.
How do you hyperlink an image that’s part of the background?
If you add your own backgrounds to Google Slides, there might be times that you want to hyperlink a certain part of the background. Since the background can’t be selected, you can’t hyperlink that spot the same way. However, there’s a handy little trick to hyperlinking any spot on a Google Slide. Here’s what you can do.
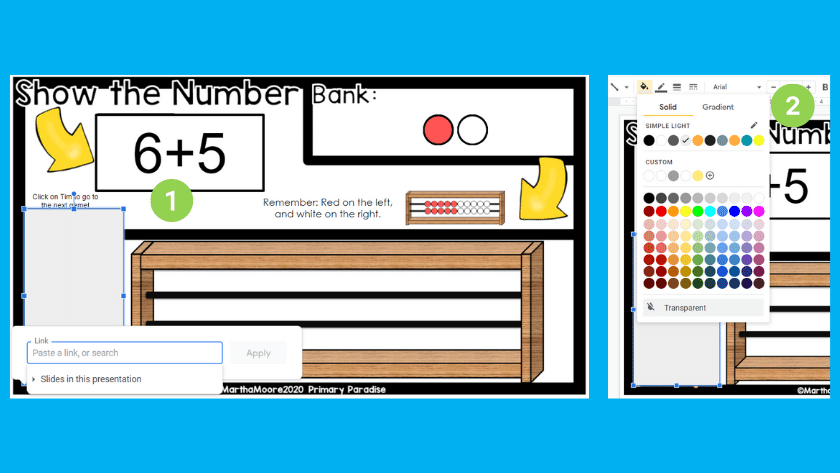
- Add a shape over the spot you want to hyperlink.
- Right click on your shape.
- Click on “link” (or you can use the shortcut control+k).
- Add your link.
- Click apply.
- Change the shape color to transparent. Make the outline transparent as well.
Now you have an invisible shape that hyperlinks to whatever you selected.
Keep reading and learning:


