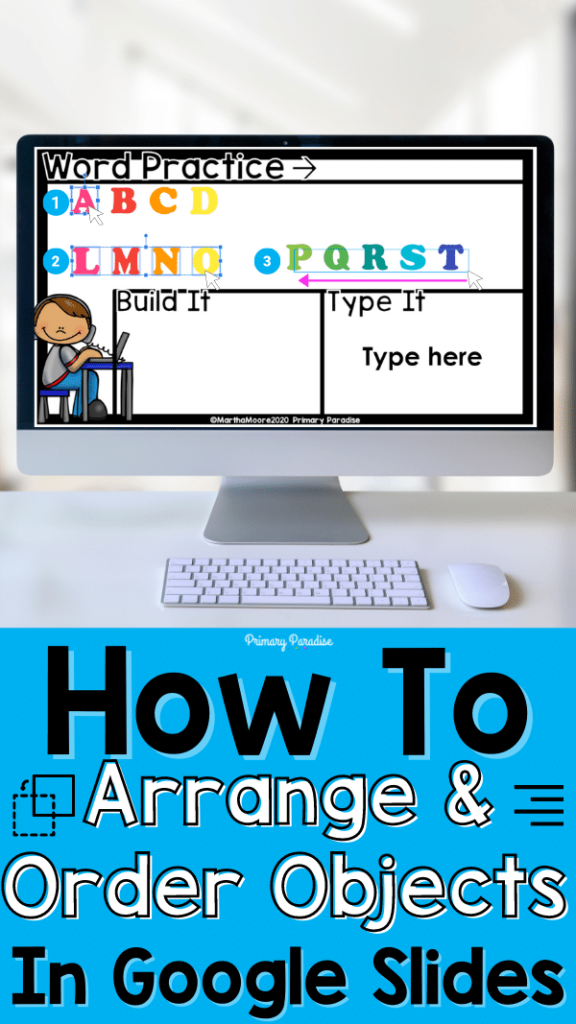
If you’re creating activities for your students in Google Slides, it’s helpful to know how to order, arrange, and align moveable pieces, text, or other elements. This will make your slides look neat and organized. It will also make them more functional for your students. Let’s take a look at how to arrange, align, and order objects.
Define the Terms
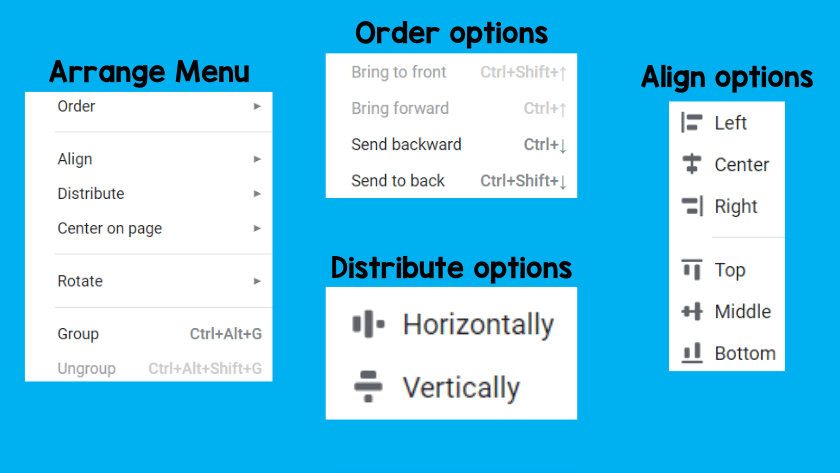
First, let’s take a look at what each of the terms that fall under “arrange” means in relation to Google Slides.
Align means to place objects in a straight line. You can align objects to the left side, the right side, or to the center. You can also align objects to the top, the middle, or the bottom. If you’re aligning objects to the left, they’ll line up with the most left object. This is the same for the right, bottom, and top.
Distribute means to put equal space between objects. You can distribute items vertically or horizontally.
Order determines which object is in the front or back. If you have two overlapping objects, you can order them by picking one to send to the front or to the back of the other.
You can also group and ungroup objects. When you group objects, they are moved and manipulated together. If you ungroup objects, they are moved and manipulated separately.
All of these tools, which are found under the “arrange” toolbar, are super helpful. So, let’s take a look at how to use them.
Selecting Objects
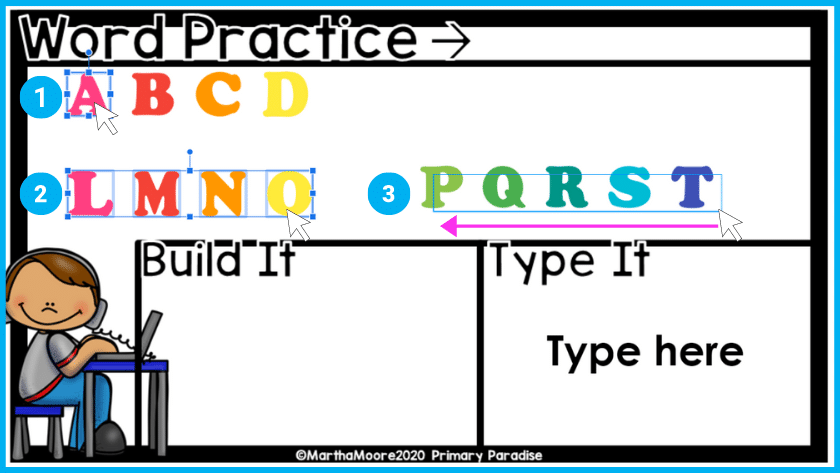
Before we get into how to use these tools, you need to know how to select objects. 1. To select one object, you left click one time. 2. To select multiple objects, you can hold down ctrl and at the same time, left click each object. 3. You can also click and drag your mouse over multiple objects to select them. However, doing this will grab any objects in the path. So, if you have objects stacked on top of each other, this will grab all of the objects. You can see examples in the illustration below.
Arranging Objects in Google Slides
Arranging objects, text, and other elements in Google Slides is pretty simple once you get the hang of it. Now that you know the different ways to select objects, you’re ready to get started.
Order Objects in Google Slides

Knowing how to order objects will save you and your students a lot of headaches. If you’re trying to build a picture from shapes, for example, you’ll need to know how to order objects. It’s helpful to note that the most recently added object will always be on top. If you want to put one object on top of another, you simply click on the object (or text box). Then, you can either right click on the object, hover over order, and select bring to front or bring forward. Or, you can use select arrange in the top toolbar. Bring to front will bring the object in front of all other objects.
Bring forward will bring it in front of the object it is in back of. (So, if you have star, circle, letter A, select star and bring forward, you’ll have circle, star letter A.) Here is an example of bring a letter on top of a shape. If you want to send something backwards, you’d do it the same way.
Grouping and Ungrouping Objects

In the example above, I am making a word puzzle. SO, I would next want to group each shape with the letter. This is very simple to do. I simple drag my mouse over both shapes, right click (or go to the arrange option in the toolbar) and select group. Alternately, I can use the shortcut ctrl+alt+g at the same time. Now, those objects are grouped together. To ungroup them, I would select ungroup in the toolbar. I can also use the shortcut ctrl+alt+shift+g.
It is possible, while objects are grouped, to just move one. If I click on the grouped objects, and then click again, I can move just one object. This is a common mistake students make, so be sure to teach them to use control+z to undo.
Align Objects in Google Slides
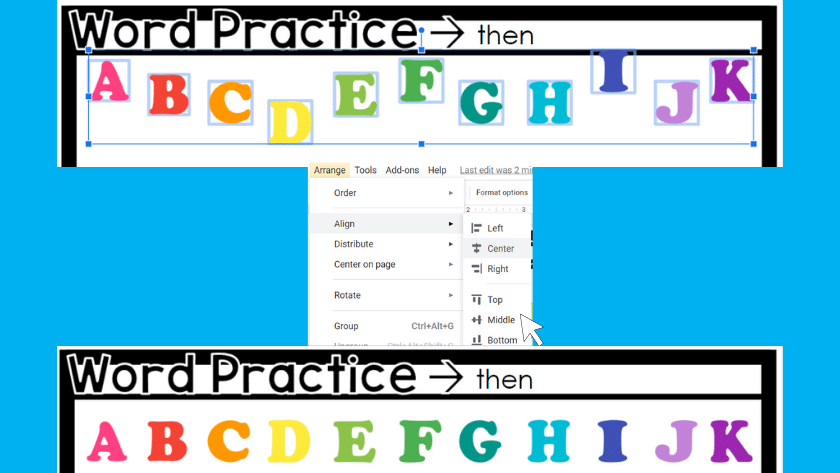
If you have a series of objects, it’s helpful to know how to align them. To align objects select them all and then decide how you want them to be aligned. Click on your choice, and they’ll all be lined up nicely.
Distribute Objects
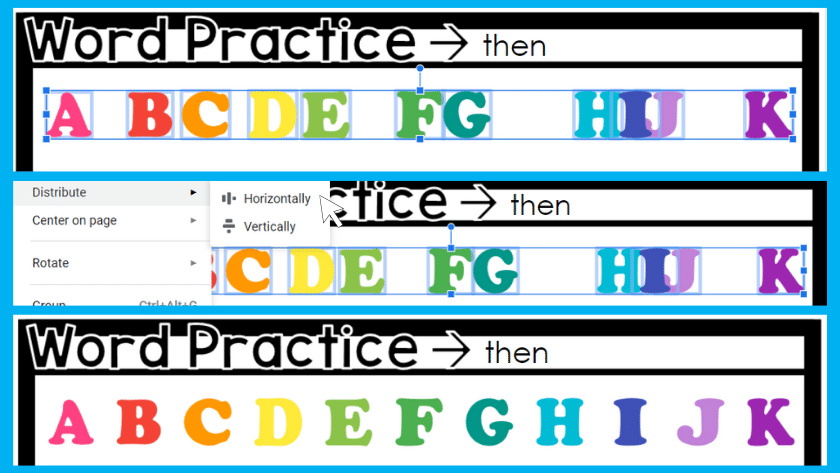
Often after you align objects, they’re lined up neatly, but they’re not spaced evenly. Distribute is the tool you need. Again, select all of the object and then select to distribute them horizontally or vertically.
And now you’re ready to create some engaging Google Slide Activities!
Keep reading and learning:
- A Basic Tour of Google Slides
- How to Use Present and Edit Mode in Google Slides
- 5 Reasons to Use Digital Templates for Google Slides
- How to Embed a Video In Google Slides
